For the uninitiated, VMware NSX comes in two “flavours”, NSX-V which is heavily integrated with vSphere, and NSX-T which is more IaaS agnostic. NSX-T also has more emphasis on facilitating container-based applications, providing a number of features into our container ecosystem. In this blog post, we discuss the microsegmentation capabilities provided by NSX-T in combination with container technology.
What is Microsegmentation?
Prior to Software-defined networking, firewall functions were largely centralised, typically manifested as edge devices which were and still are, good for controlling traffic to and from the datacenter, otherwise known as north-south traffic:
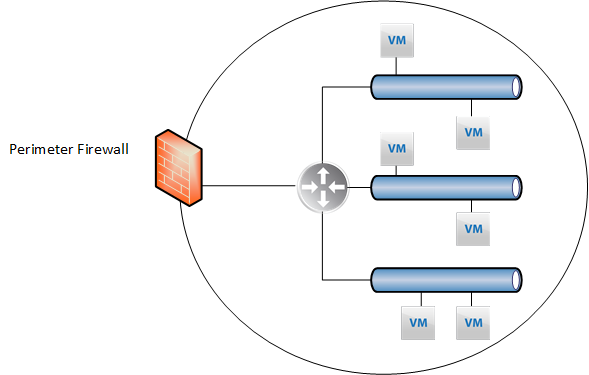
The problem with this model, however, is the lack of control for resources that reside within the datacenter, aka east-west traffic. Thankfully, VMware NSX (-V or -T) can facilitate this, manifested by the distributed firewall.
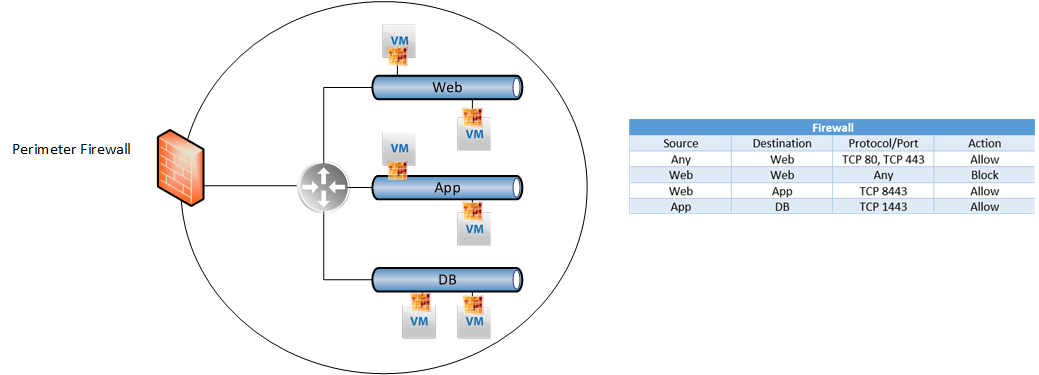
Because of the distributed firewall, we have complete control over lateral movement within our datacenter. In the example above we can define firewall rules between logical tiers of our application which enforce permitted traffic.
But what about containers?
Containers are fundamentally different from Virtual machines in both how they’re instantiated and how they’re managed. Containers run on hosts that are usually VM’s themselves, so how can we achieve the same level of lateral network security we have with Virtual Machines, but with containers?
Introducing the NSX-T Container Plugin
The NSX-T container plugin facilitates the exposure of container “Pods” as NSX-T logical switch ports and because of this, we can implement microsegmentation rules as well as expose Pod’s to the wider NSX ecosystem, using the same approach we have with Virtual Machines.
Additionally, we can leverage other NSX-T constructs with our YAML files. For example, we can request load balancers from NSX-T to facilitate our application, which I will demonstrate further on. For this example, I’ve leveraged PKS to facilitate the Kubernetes infrastructure.
Microsegmentation in action
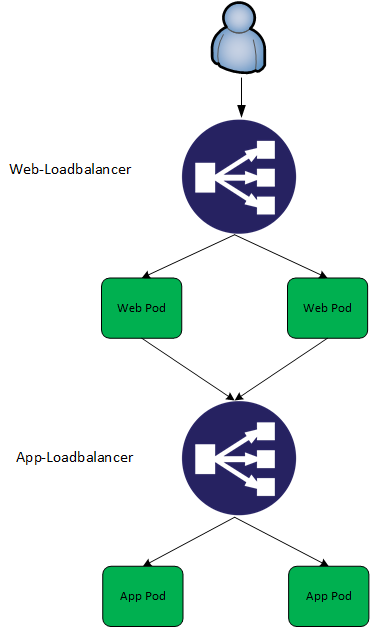
Talk is cheap, so here’s a demonstration of the concepts previously discussed. First, we need a multitier app. For my example, I’m simply using a bunch of nginx images, but with some imagination you can think of more relevant use cases:
Declaring Load balancers
To begin with, I declare two load balancers, one for each tier of my application. Inclusion into these load balancers is determined by tags.
apiVersion: v1
kind: Service
metadata:
name: web-loadbalancer
  labels:
  namespace: vt-web
spec:
  type: LoadBalancer
  ports:
  - port: 80
    protocol: TCP
    targetPort: 80
  selector:
    app: web-frontend
    tier: frontend
---
apiVersion: v1
kind: Service
metadata:
 name: app-loadbalancer
 labels:
 namespace: vt-web
spec:
 type: LoadBalancer
 ports:
 - port: 8080
 protocol: TCP
 targetPort: 80
 selector:
 app: web-midtier
 tier: midtier
---
Declaring Containers
Next, I define the containers I want to run for this application.
<pre>---
apiVersion: extensions/v1beta1
kind: Deployment
metadata:
 name: web-frontend
 namespace: vt-web
spec:
 replicas: 2
 template:
 metadata:
 labels:
 app: vt-webapp
 tier: webtier
 spec:
 containers:
 - name: web-frontend
 image: nginx:latest
 ports:
 - containerPort: 80
---
apiVersion: extensions/v1beta1
kind: Deployment
metadata:
 name: web-midtier
 namespace: vt-web
spec:
 replicas: 2
 template:
 metadata:
 labels:
 app: web-midtier
 tier: apptier
 spec:
 containers:
 - name: web-midtier
 image: nginx:latest
 ports:
 - containerPort: 80</pre>
Logically, this app looks like this:
Deploying app
david@ubuntu_1804:~/vt-webapp$ kubectl create namespace vt-web
namespace "vt-web" created
david@ubuntu_1804:~/vt-webapp$ kubectl apply -f webappv2.yaml
service "web-loadbalancer" created
service "app-loadbalancer" created
deployment "web-frontend" created
deployment "web-midtier" created
Testing Microsegmentation
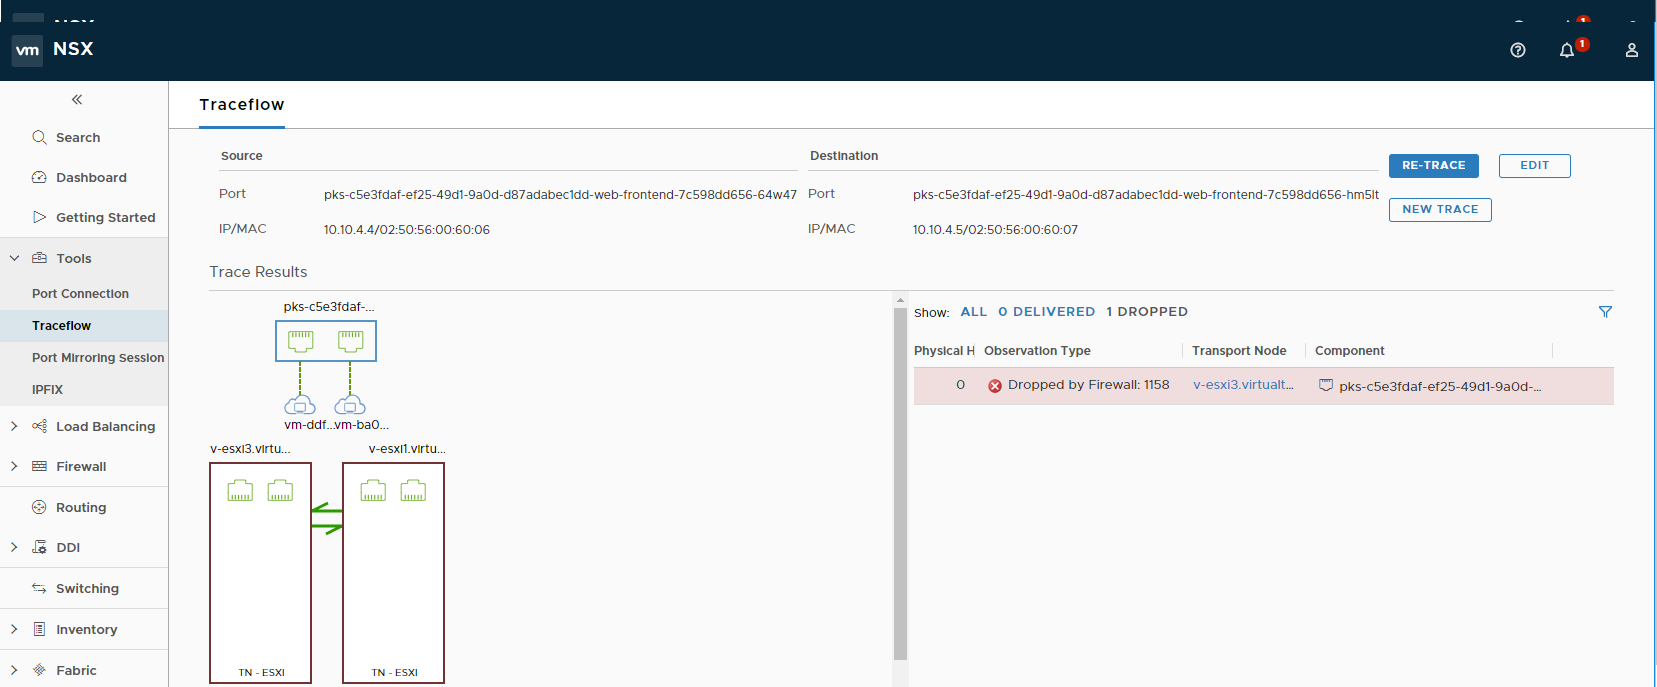
At this stage, we’re not leveraging the Microsegmentation capabilities of NSX-T. To validate this we can simply do a traceflow between two web-frontend containers over port 80:

As expected, traffic between these two containers is permitted. So, lets change that. In the NSX-T web interface go to inventory -> Groups and click on “Add”. Give it a meaningful name.
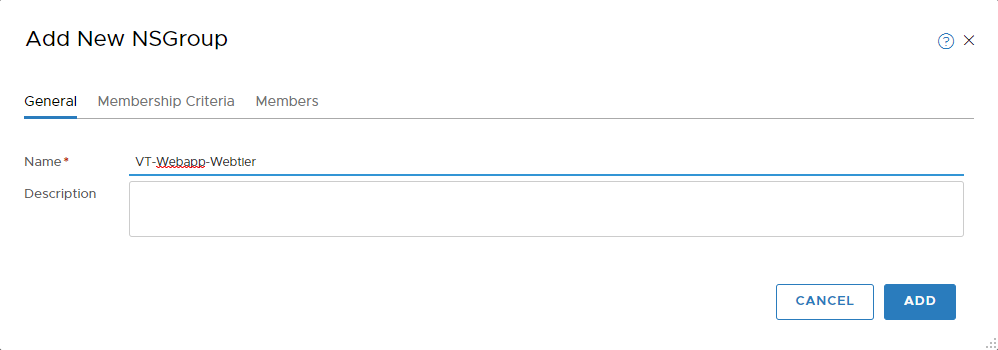
As for membership Criteria, we can select the tags we’ve previously designed, namely tier and app.
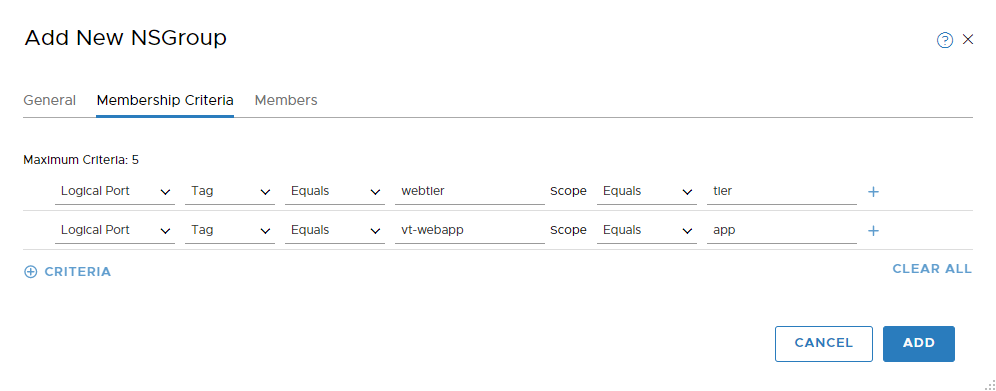
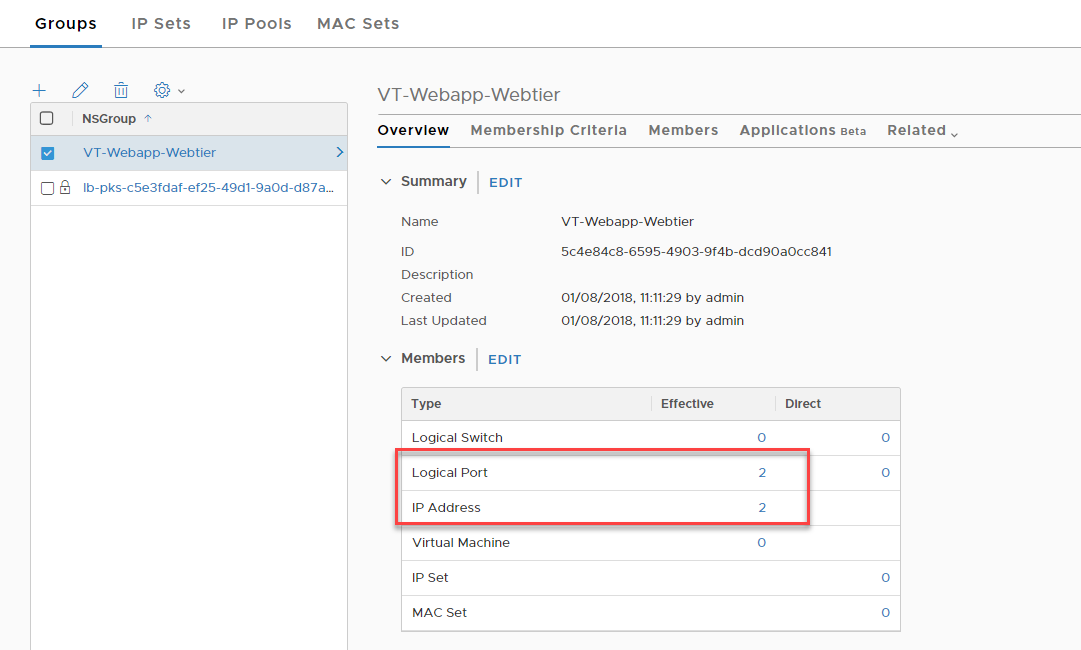
Click “add”. After which we can validate:
We can then create a firewall rule to block TCP 80 between members of this group:
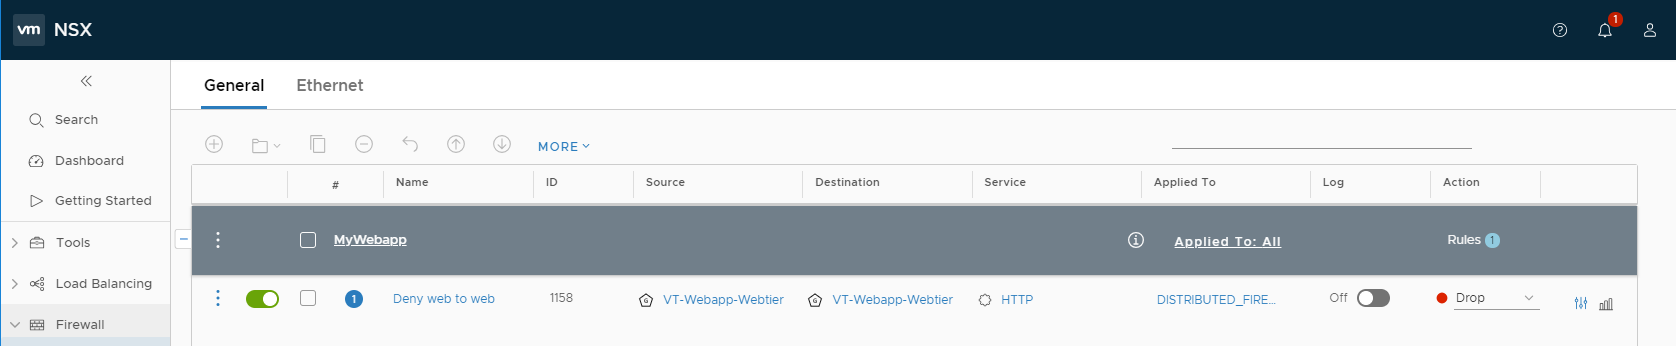
Consequently, if we run the same traceflow exercise:
Conclusion
NSX-T provides an extremely comprehensive framework for containerised applications. Given the nature of containers in general, I think container + microsegmentation are a winning combination to secure these workloads. Dynamic inclusion adheres to the automated mentality of containers, and with very little effort we can implement microsegmentation using a framework that is agnostic – the principles are the same between VM’s and containers.
Leave a Reply